Use your widget sidebars in the admin Design tab to change this little blurb here. Add the text widget to the Blurb Sidebar!
Posted: March 22nd, 2014 | Author: Lori Paximadis | Filed under: Manini Project 2014 | 1 Comment »
Last week was a bit of a whirlwind despite being a slow-ish work week. I filed for my editing business LLC on the 14th and received the approval and paperwork back on the 18th. In addition to opening bank accounts, starting to notify clients, filling out paperwork, and all the other stuff a business name change involves, I found some time to sit down, bang out a logo, and design some business cards, letterhead, and envelopes for Pax Studio LLC.

(Letterhead? Envelopes? In this day and age? Actually, yes. Some of my clients still deal with paper through the mail, and I thought it would be a nice touch, considering how much I love that green and how inexpensive it was.)
While I was hanging out over at Overnight Prints, which is my online printer of choice, I went ahead and ordered more business cards for Alchemary and some hangtags that I threw together at the last minute.
The one thing I didn’t do as part of this changeover is create a new website. The pirate holding PaxStudio.com hostage wants way too much money for it, and thus I shall remain at LoriPax.com for the foreseeable future. My clients are smart enough to figure that out. I did make a few changes over at my existing website, though, and will be making more in the coming months. I also registered PaxStudio.biz, which I will get around to redirecting one of these days, and I may sometime down the road consider shifting there eventually.
Other items on the manini list are in progress this weekend, and I’ll update those as I finish.
Posted: March 15th, 2014 | Author: Lori Paximadis | Filed under: Manini Project 2014 | 1 Comment »
I have been very, very lazy since, oh, forever with my Etsy shop. When I formed Alchemary LLC last year, of course I jumped in and opened a shop with that name, to help with branding and to make sure no one else grabbed it, but I just kind of grabbed what I had already used on my old shop and winged the rest, including the deadly boring banner.
It’s been on my to-do list forever to upgrade that banner, and thus it made the Manini List. While I was at it, I did a little work on the website banner, too. Here’s the Etsy banner:

I’m still not completely satisfied with it, but it is a vast improvement on the type-only banner that was there before. The website banner is the same, minus the stamped background.
Posted: March 14th, 2014 | Author: Lori Paximadis | Filed under: Manini Project 2014 | 2 Comments »
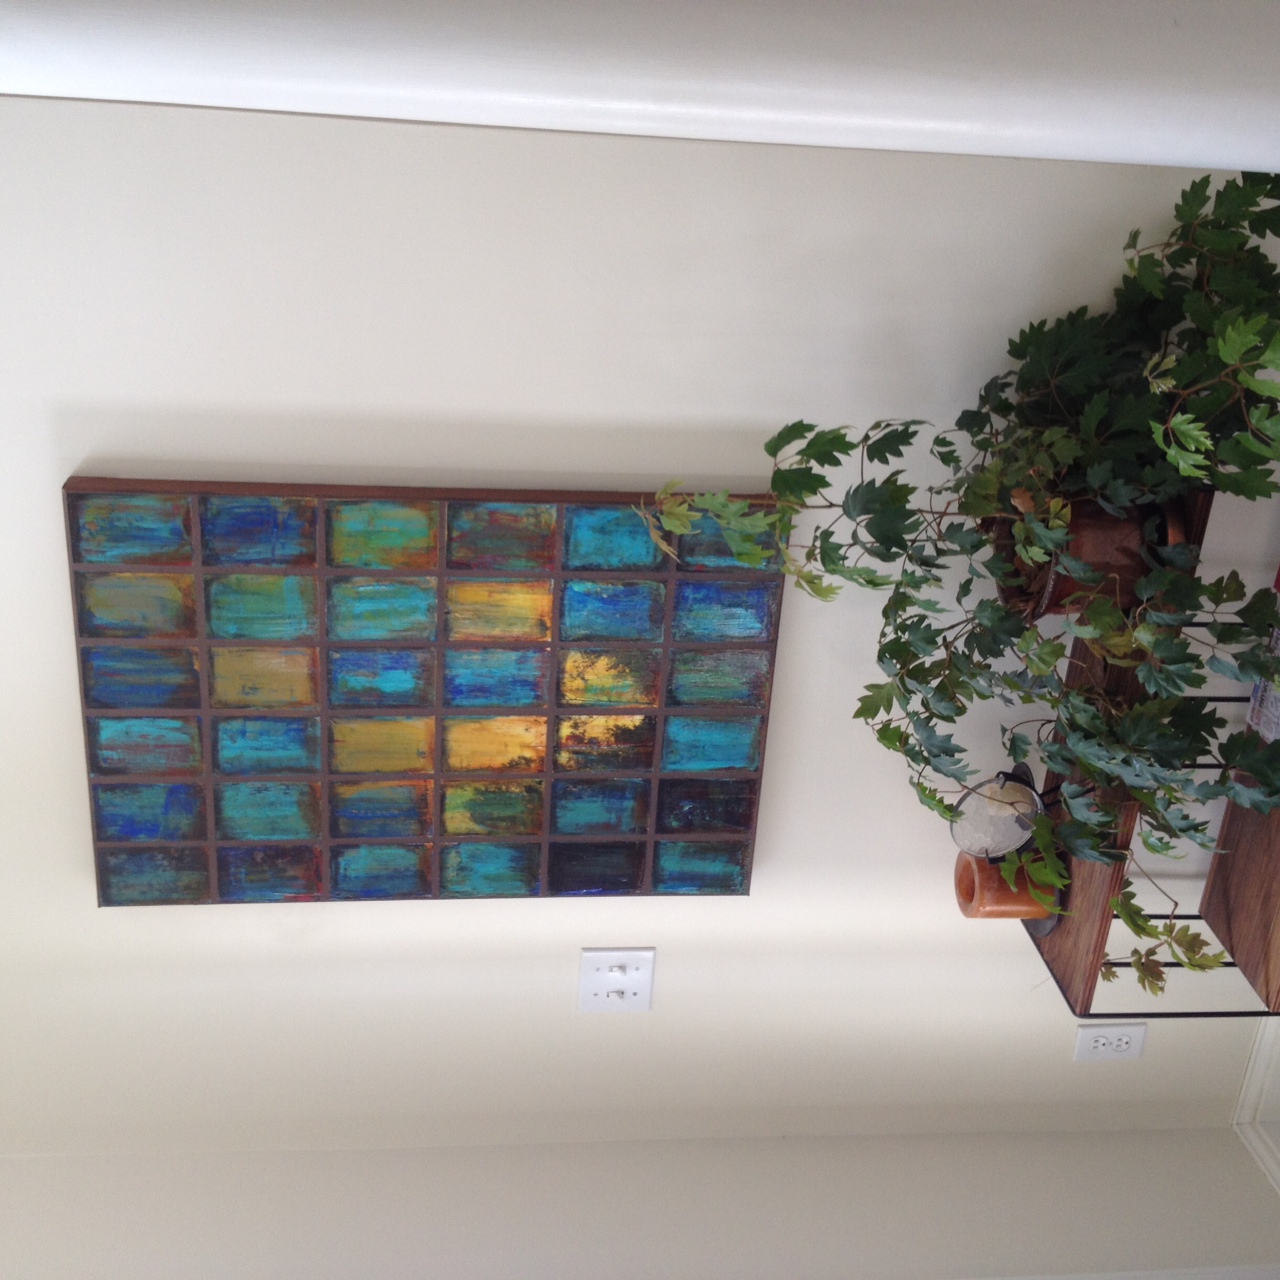
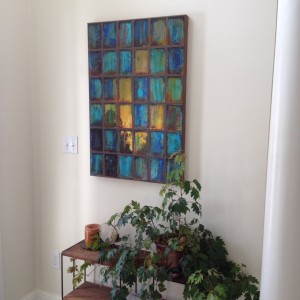
It wasn’t for want of a nail that the painting I bought back in December has been simply propped up against the wall in the entryway, but for want of four minutes to actually hang it. Getting the wall hooks out of the package took the most time of this whole project — who invented that horrible sharp plastic packaging anyway? My go-to hooks are by Ook, and I almost always go the overkill route by using a hanger rated for at least two or three times the load I’m hanging.
The most difficult part was being one person eyeballing the right height for the hook, then measuring to find the center — and miracle of all miracles, there was a little divot in the wall from where a hook had previously been placed to hang something there. I went about half an inch below that mark (the Ook nails are thin, so I didn’t want to go into the filled hole in case it was larger and thus the nail would not be as secure).
Ta-da:
The painting is by our studio neighbor in the Screw Factory, Megan Frankenfield. I had a bit of a hard time choosing a piece of the many options she had at Last Minute Market, but something about this one grabbed me, and I’m delighted that I now own it and was able to support a local artist, too.
In other news, of the less visually interesting kind, yesterday I was able to clean out all the cruft that had settled on my project shelves over the past few months. I try hard to keep what’s on them limited to my physical inboxes and work-related projects only, but once in a while, when I get distracted and busy, that breaks down. The last six months or so have been a perfect storm of work projects and personal projects and all kinds of other stuff, and the project shelves turned into a place to shove anything that I didn’t have to deal with right away. I didn’t even take a “before” picture, it was so embarrassing (nor an “after” picture, because it’s just boring).
Yesterday I spent a couple of hours clearing those shelves, dealing with the stuff on them and moving stuff that didn’t belong there to where it does belong, and now the only things there are my inboxes and the hardcopy proofreading project I’m currently working on. There’s still some stuff in the inboxes to be dealt with, and a small pile of things that need to be filed, but nothing that can’t wait until next week.
Posted: March 12th, 2014 | Author: Lori Paximadis | Filed under: Manini Project 2014 | 1 Comment »
Last year, I finally got around to forming my LLC for my jewelry business (Alchemary) and had my logo professionally produced, and I decided that it was time to up my game with my show banner. I’ve tried a few different things over the years: paper signs in frames, paper signs laminated and mounted to boards, and even a professionally printed vinyl banner, which was nice for what it was, but didn’t really suit the image I’m going for with my business.

I recently heard about Spoonflower, a company that will print custom designs on nice-quality fabric for a reasonable cost. They have some good reviews, so I figured it was worth a shot.
First, I made a copy of the Illustrator file for my logo, in case I messed it up. I am about the farthest thing you can get from Illustrator-savvy, so I had to muck around a bit and do some Google searching to figure out how to make the whole thing bigger and rotate the image so it would fit the fabric dimensions better. (One of these days I will sit down and learn Illustrator. Really.) After I figured that bit out, it was easy to export it to JPG format and upload it to the Spoonflower site. From there, it was a matter of messing around with their options and settings to get the logo placed where I wanted it, then choosing the fabric (I went for a more expensive cotton/linen blend, which fits my image well) and completing the transaction.
I ordered one yard plus two fat quarters, each with the logo centered on it. The larger piece will be the main hanging banner, mainly for outdoor shows. The smaller pieces I’ll use for shows when I don’t have the option of hanging a large banner, and I’d like to figure out a way I can also temporarily hang them back-to-back for use as a flag on a stand.
My order should be here in about three weeks.
Posted: March 11th, 2014 | Author: Lori Paximadis | Filed under: Manini Project 2014 | 1 Comment »
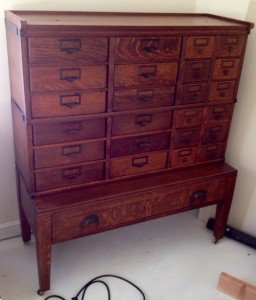
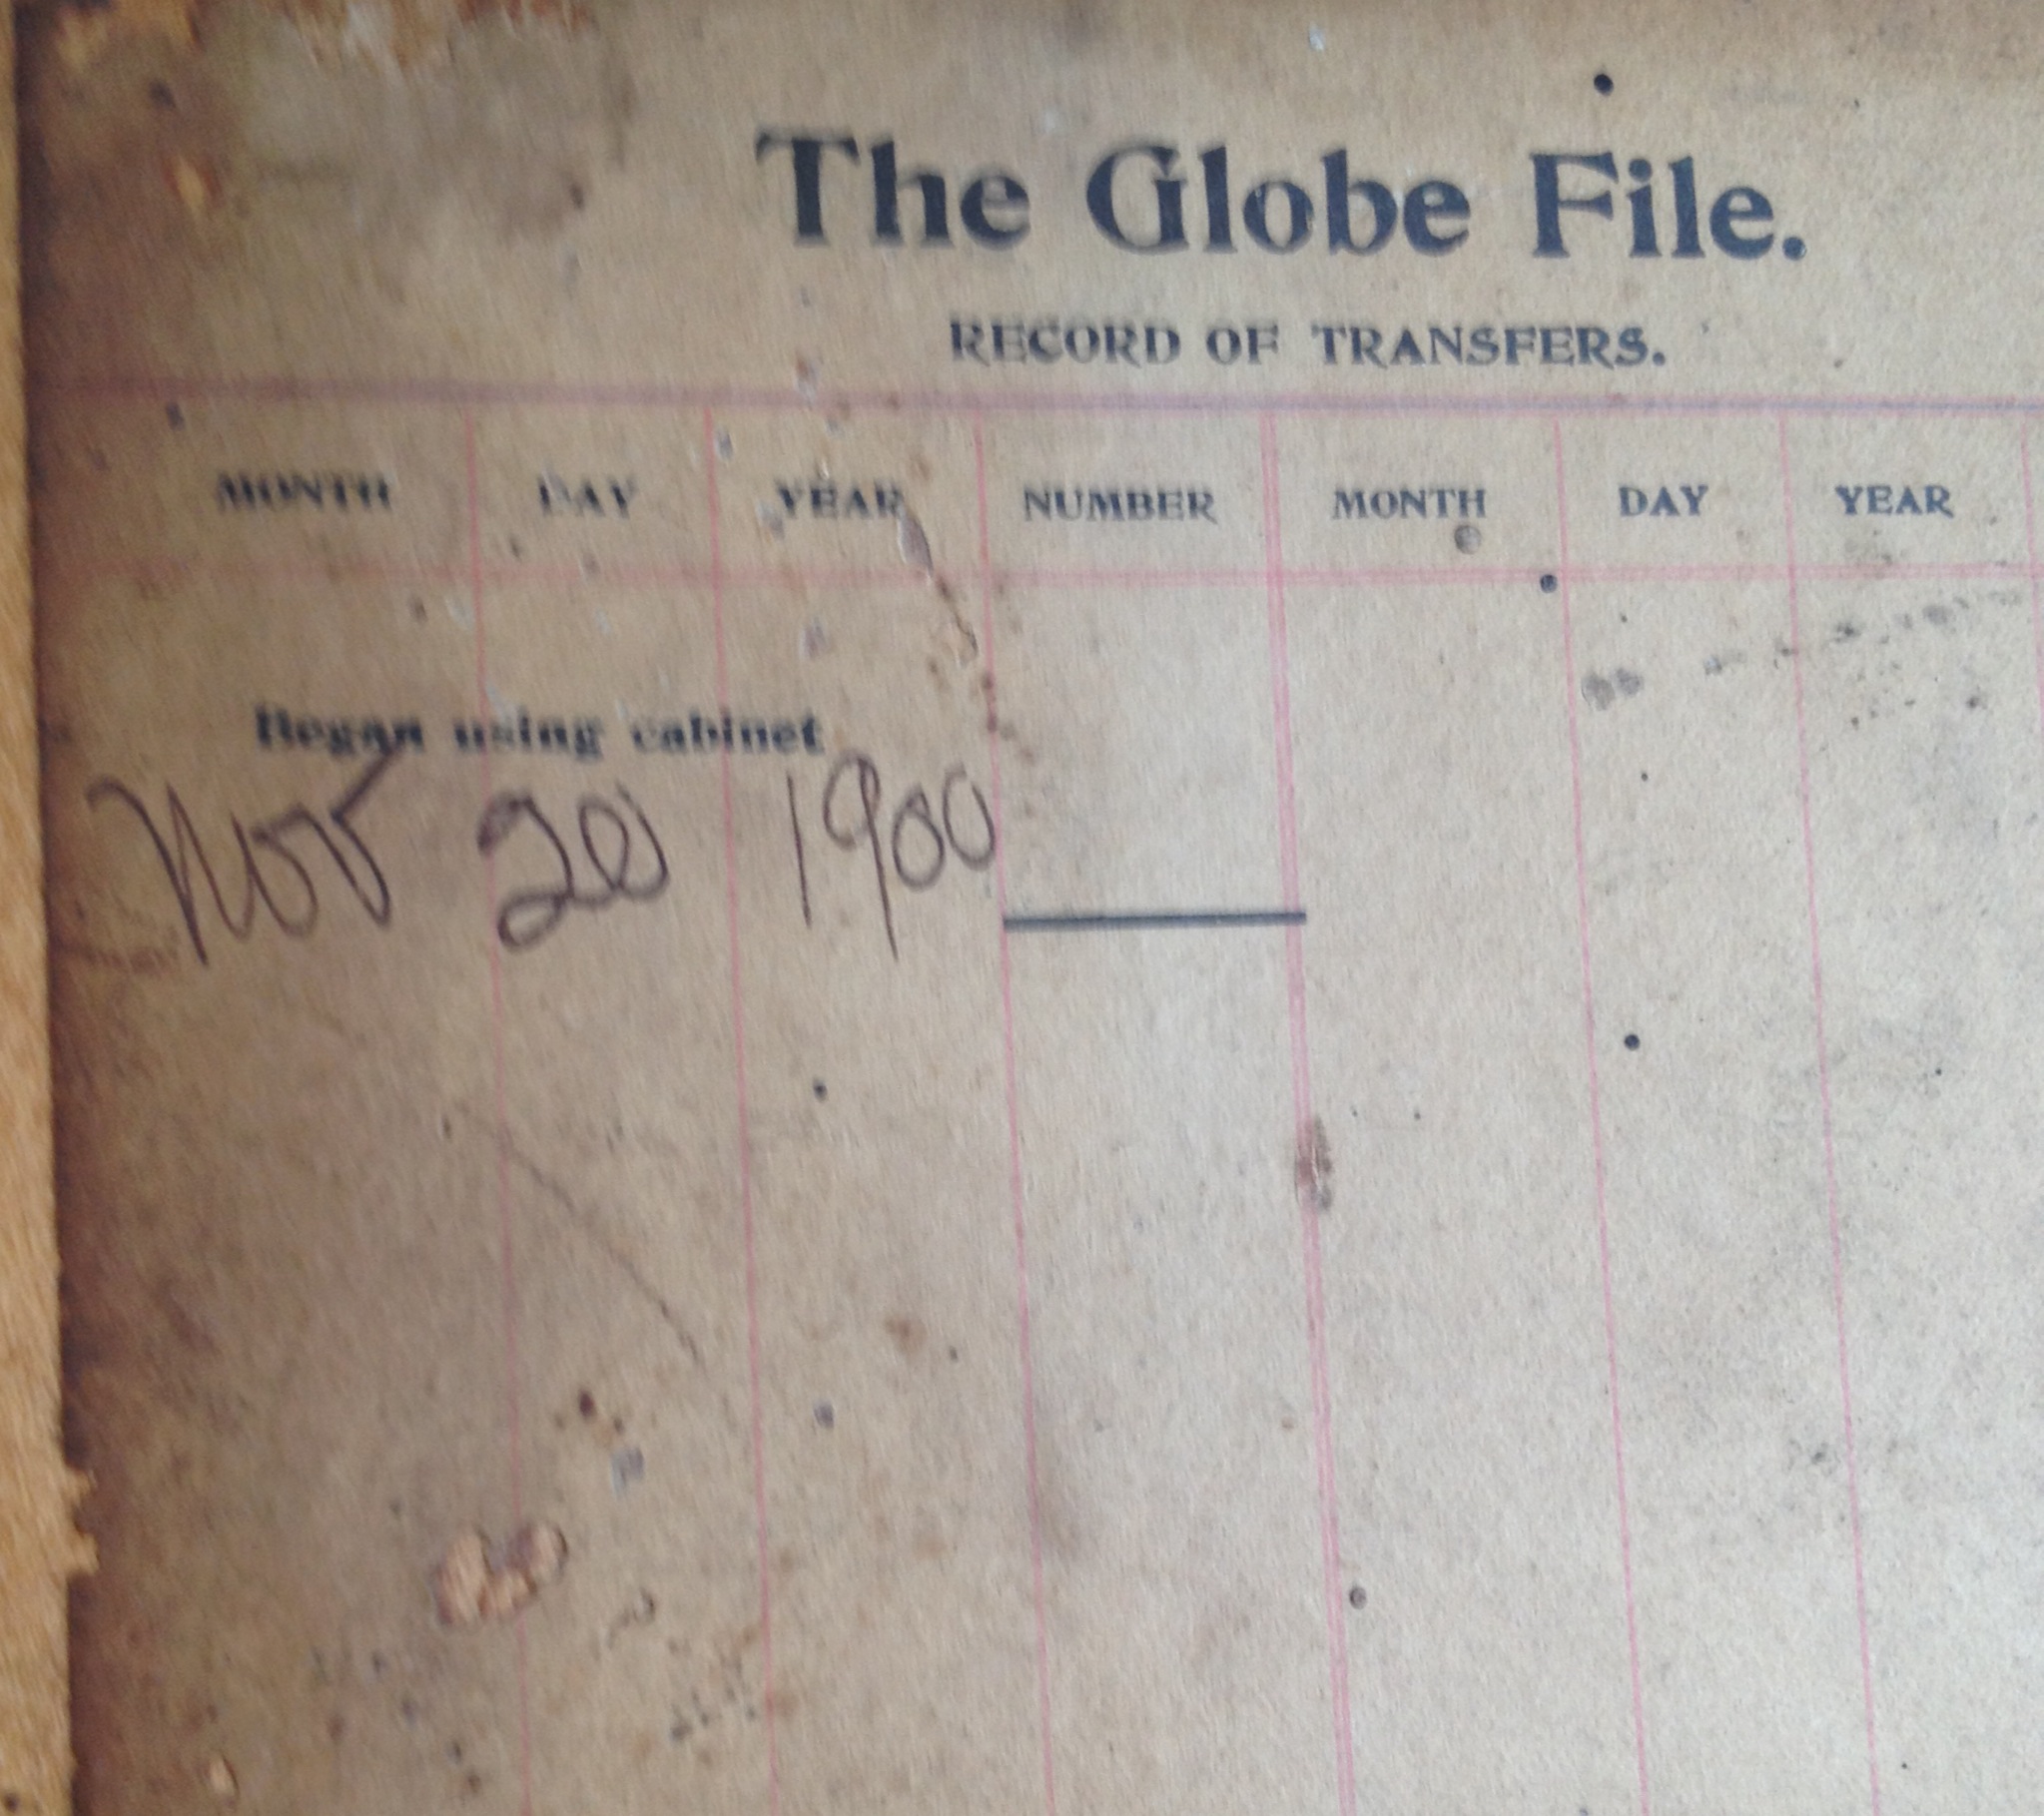
This beauty is currently called the dark cabinet. It was an eBay find last summer. I paid too much for it, but I love it. It’s a Globe Ideal File document cabinet, which used to be used for filing invoices and such. The patent is dated 1892, and several of the larger drawers have log sheets in them with a starting date of November 20, 1900. I’m guessing that not all of the drawers are original to this cabinet, given the slightly different finish some of them have, but that’s fine — it’s charm.

The twelve larger drawers on the left are large enough to hold 8.5 x 11 paper sideways (we’ll talk more about those drawers soon). The drawers on the right are the same size as card catalog drawers and will hold 3 x 5 cards. Those top sets of drawers are a bit shallower than typical card catalog drawers, just a bit under a foot deep. The base that it sits on is a little deeper and contains one giant flat file drawer, which is what made me really drool over this piece in the first place.
Overall it’s in decent shape — just a few drawers needed some shoring up, and there’s a little bit of superficial water damage on the sides in the middle section. After a bit of time with some wood glue and clamps, the structure of the drawers is pretty good. It was desperately dirty, though, and needed a bit of cleanup.
A while back I read on Young House Love (one of my very favorite home blogs) about a wood finish refreshing product they used on an older wooden cabinet in their home, Howard Restor-a-Finish, followed by their Feed-n-Wax. It sounded perfect to try on this piece, so off I went to track it down. I finally found it at Home Depot, back in the stain aisle. Of course, I got the stuff last fall, then finally around Christmastime had a sliver of time to get around to starting on this project.
After the above-mentioned drawer TLC (and some additional steps we’ll talk about when we talk about the drawers specifically) and a scrub-down with Murphy’s Oil Soap, I dove in with the Restor-a-Finish. It’s very liquidy and smelly, and you definitely need gloves and old rags you’re going to throw away when you’re done and preferably a place to work outside. (I just opened a window. In December.) The process is pretty much like working with stain: wipe it on, let it sit for a little while, then wipe off the excess. I used a bit of 0000 steel wool in a few places where the original finish seemed to have gunked up, and that worked nicely. Mostly, though, it was wipe, sit, wipe.
And there it sat for another nearly four months while work and life came flying at me, leaving not much time for anything else I wanted to get done. I have a lot of desire to get this project finished, so it’s the first one I tackled on the 2014 Manini Project list. Yesterday I finally got around to scrubbing out the insides of the drawers (yes, really, I should have done that before finishing the outside, but after I’ve used up all my logic on my day job, I don’t always have much left for other stuff). They were a mess of more than a century’s worth of dirt and more than a few cobwebs from wherever it had been stored while waiting to find a new home.
After the drawers were cleaned up, I tackled the whole piece — including the insides of the drawers — with the Feed-n-Wax. It’s a combo of orange oil, beeswax, and carnauba wax (and probably some other stuff not listed), and despite having a little petroleum undertone when you first put it on, I think it smells pretty good. The old wood was really dry and sucked that stuff up, especially on the unfinished insides of the drawers; I’ll probably give it another treatment with the wax on those places at least before I start filling it up with stuff.
And that was yesterday’s progress, a two-fer. More to come with this piece next.
Posted: March 10th, 2014 | Author: Lori Paximadis | Filed under: Manini Project 2014 | 4 Comments »
It’s that time of year again, when I can just barely feel the very beginnings of spring and start to get antsy. We’re finally starting to move forward on some house projects, too, and that has me wanting to make deliberate progress on some little things around the house and in my life that have been lingering far too long. Thus, behold: the 2014 Manini Project, which will be taking place in March and April this year.
What is the Manini Project? The Manini Project is when I pick a month, make a list of little things that have been on my to-do list for too long (one for each day), and tackle them. (“Manini” is Hawaiian slang for “little, annoying, irritating.” Like gnats.) Last year, I tackled things like paint touch-ups, framing paintings, cord management — lots of stuff in my office, where I spend the majority of my days, but elsewhere around the house, too. Much of the list was made up of physical projects, but some were things like making put-off doctor’s appointments and data entry on the computer.
Rules? Nothing is written in stone, except list as many things as there are days in the month and aim to be done with them all by the end of the month. I try for a thing a day, but it doesn’t always work out that way, and that’s okay. I try to keep each item to under an hour, but many are much less and some are a bit longer, and that’s okay, too. Order doesn’t matter; the numbering is just to make sure I get the right number of things. I pick and choose which to do based on the time and energy I have available on a given day.
This year, I was so slammed with work at the beginning of March that I wasn’t able to start then, but why wait until the beginning of the next month? I’m starting on March 10 and aim to be finished on April 9. It’s still a month, even if it doesn’t neatly coincide with the months on the calendar.
So, what’s on the list this year?
- Post Mom’s lamp for sale on eBay (take pictures, edit, research, etc.).
- Purge hanging stuff in closet, vacuum around edges.
- Purge folded stuff in closet, clean shelves.
Clean insides of drawers in dark cabinet. (3/10)- Cut and install drawer backs in dark cabinet.
- Line drawer bottoms in new cabinets.
Wax dark cabinet. (3/10)- Sew carrying bags for display boards.
Order new Alchemary sign. (3/12)- Scan family photos from Papa’s album.
Clean up project shelves. (3/13)- Scan necessary vintage paperwork on project shelves.
- Sew cover for bench.
- Create fundraising order form.
- Consolidate info in little notebooks.
- Purge, trim, and rearrange plants.
- Purge software drawer; consolidate and move to storage.
- Purge linen closet.
- Clean out and rearrange guest room closet.
- Treat and seal top of library card catalog.
- Make labels for new studio drawers; redo existing that need to be fixed.
- Strip glue off dining room floor in front of windows.
- Clean & organize deskside drawers.
- Purge CDS, put keepers in new cases.
New banner for Etsy site. (3/15)Order new business cards & hang tags for Alchemary; order new business cards for freelance business. (3/19)- Shoe purge.
- Bead purge.
- Purge old jewelry pieces from inventory, deconstruct.
- Set up sewing station in Lilyroom.
Hang painting in entryway. (3/14)
Want to play along? I’d love to follow your project, too. Just leave a note in the comments with a link to your project. (Comments automatically close after 14 days — damn spammers made me make that change around here — so if you’re coming in after that, just leave a comment on one of the later posts; I’ll still see it.)