quick & dirty art
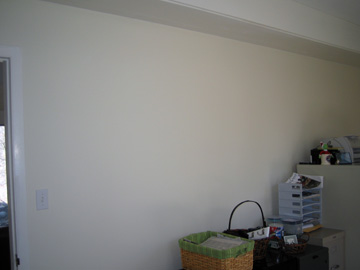
Posted: April 24th, 2009 | Author: Lori Paximadis | Filed under: life | 2 Comments »February’s office painting binge left me with pretty but bare walls.

We have larger plans for the office, including nicer — and matching — file cabinets and desks, some additional shelving, and some great art. For the moment, though, there are higher things on the priority list, and I was looking for an easy and inexpensive way to add a punch of color to the walls without resorting to posters or some generic print from Target or Marshall’s. Etsy was of course my first shopping choice, but the items I liked in the size I wanted were out of my price range (as well they should be), and I’m just not ready to make that commitment yet.
So, my first instinct was to seek out a big, bold fabric that I could stretch over a frame and hang, like a Marimekko print. But I wasn’t finding what I wanted at the fabric stores. Then inspiration struck as I was in the scrapbooking aisle picking up some stickers for this weekend’s etching class: scrapbook paper.

Scrapbook paper comes in an insane range of patterns in standard 12 x 12 inch size. Most of it is scaled small, with tiny repeating prints, but if you can get to a dedicated scrapbooking store (we have an Archiver’s at the mall nearby), you can usually find some that have big prints in bold colors. I dug around in the discontinued bins and found all these patterns for under $1/sheet, except for the one I ended up using in the office, which wasn’t on clearance but was still only about $1.75/sheet.
I found frames made specifically for scrapbook pages at the local craft supply store (Pat Catan’s) for about $8 each. They are aluminum and come in black and regular aluminum color. They also had wooden ones and acrylic ones, but I liked the quality and look of these better. (The photo is of the insert only because the photo I took with the insert in the actual frame as I was unwrapping it didn’t turn out, and I couldn’t find a product photo online in a short amount of time.)

If you can’t find scrapbook frames, Target carries an album cover frame that might work. It’s a little bigger than the standard 12 x 12 scrapbook page, but you could put something around the edges to take up the extra space, like strips of coordinating paper.

Most scrapbook paper comes with a border on one edge that carries the UPC and manufacturer info. Some of them are perforated; others you have to cut. My paper cutter is of course 1/2 inch too small to handle this size paper (I still lust after one of those huge wooden guillotines we had in elementary school), so I cut carefully along the line with scissors. It doesn’t have to be super-perfect; the frame will cover the very edge of the paper (unless you are using an acrylic frame, which you’ll be able to see through).

The aluminum frames are very easy to open: just push down on the clips and slide them to the side. Take out the backing, remove the paper insert, put your scrapbook paper in there, reassemble, and voilá: instant art! I chose to use three sheets of the same pattern in three frames because I had to fill up a big space. I considered using three coordinating prints, but my brain was a little too frazzled that day to find three I really liked together.

At the scrapbooking store I found just one sheet of this pretty blue print, so although my intent was to just liven up the office, I couldn’t resist getting this and another frame to put a little something above my bedside table.

The real beauty of these is that they are so easy to change out and the paper is so cheap. When I get sick of what’s in there, I can change it out with something else. And when it’s time to get some real art, these will do nicely to fill in some of the smaller areas we have.
Lori! This is such a great idea! I’ve been wanting to do it somewhere, but I seem to be running out of wall space. I saw it once with 12 coordinating papers somewhere…..probably the scrapbook store. I just gave away all sorts of scrapbooking paper yesterday…..
What a great solution Lori!